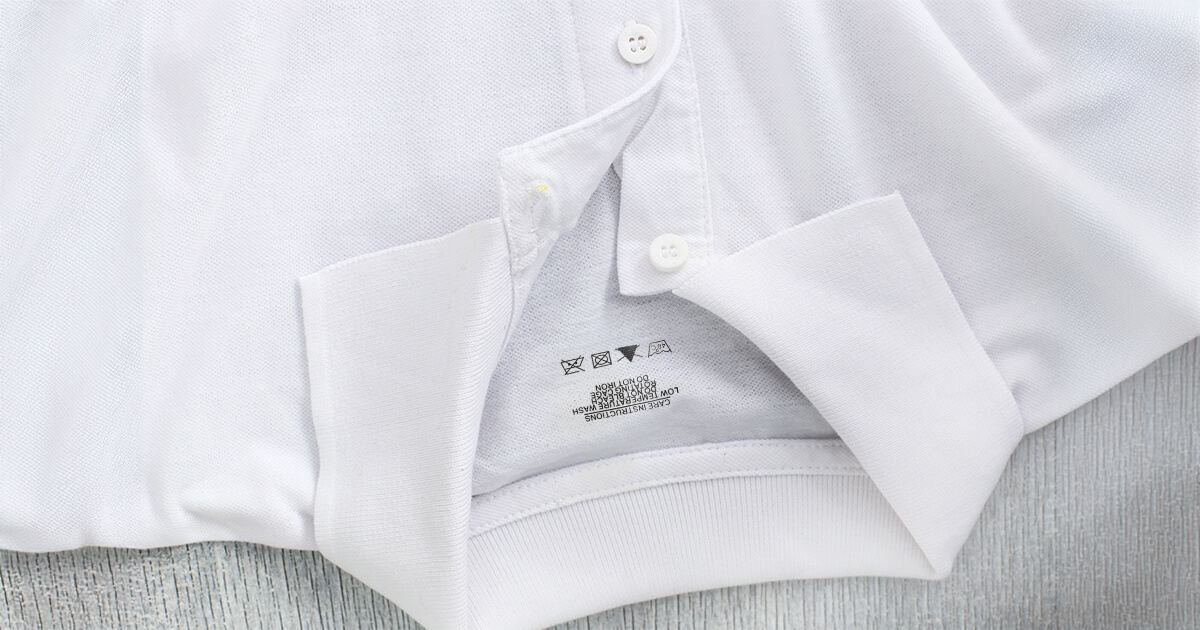
Clothing packaging ideas: Make a lasting impression on customers

clothing packaging ideas

In the competitive world of fashion retail, packaging goes beyond mere protection for clothing items; it plays a crucial role in branding and customer experience. Clothing packaging ideas have evolved to become an integral part of a brand’s identity, where elements like color, shape, and design speak volumes about the company’s style and values. Thoughtfully designed packaging can make a brand stand out on the shelf and linger in the minds of consumers, turning a simple purchase into a memorable experience.

With sustainability becoming a significant consumer concern, environmentally friendly packaging solutions are increasingly in demand. Brands are adopting innovative ideas such as compostable garment bags and reusable totes to address ecological challenges and align with their audience’s values. Creative packaging options not only enhance the unboxing experience but also reflect a commitment to reducing environmental impact, often resonating well with eco-conscious shoppers.

Simultaneously, the rise in online shopping has placed additional emphasis on the practicality of packaging solutions. Durable and secure packaging ensures that items arrive in pristine condition, which is paramount for maintaining customer satisfaction and loyalty. By incorporating unique and creative packaging ideas, retailers can effectively protect and present their products while also crafting an engaging story that enhances their brand narrative.

[section bg_color=”rgb(243, 243, 243)” border=”1px 1px 1px 1px” border_radius=”10″ class=”round-corners”]

[ux_text font_size=”1″ font_size__sm=”1.1″]

Contents

[/ux_text]

1. Essentials of Clothing Packaging

2. Innovative Packaging Ideas

3. Brand Promotion Through Packaging

4. Practical Aspects of Packaging

5. Packaging for Different Types of Clothing

6. Customer Experience and Unboxing

7. Regulatory Compliance and Standards

8. Future Trends in Clothing Packaging

[/section]
[gap]

[scroll_to title=”1″ link=”1″ bullet=”false”]

[ux_text font_size=”1″ font_size__sm=”1.1″]

Essentials of Clothing Packaging

[/ux_text]

When considering clothing packaging, one must focus on materials that not only protect the garments but also embody the brand’s ethos. Equally important are design principles that facilitate usability and aesthetics, alongside environmental considerations that address sustainability.

[ux_image_box style=”none” img=”2903″ image_size=”original”]

[/ux_image_box]
[gap]

[scroll_to title=”2″ link=”2″ bullet=”false”]

[ux_text font_size=”1″ font_size__sm=”1.1″]

Material Selection

[/ux_text]

Choosing the right materials for clothing packaging is crucial. They should ensure product safety during transportation and provide a premium unboxing experience for the customer. For instance, compostable garment bags are gaining popularity for their eco-friendliness and durability, while luxurious brands might opt for high-quality paper or fabric bags that add a touch of elegance.

[scroll_to title=”3″ link=”3″ bullet=”false”]

[ux_text font_size=”1″ font_size__sm=”1.1″]

Packaging Design Principles

[/ux_text]

The design of packaging is not merely about looks; it is about functionality and brand representation. Packaging should be easy to handle, open, and sometimes resealable. The incorporation of brand colors, logos, and unique shapes can significantly boost brand recognition. For example, personalized tote bags serve as a practical yet fashionable choice that carries the brand beyond the point of sale.

[scroll_to title=”4″ link=”4″ bullet=”false”]

[ux_text font_size=”1″ font_size__sm=”1.1″]

Environmental Considerations

[/ux_text]

Sustainability in packaging is increasingly important to consumers. The use of recycled, biodegradable, or renewable materials can demonstrate a brand’s commitment to reducing its environmental impact. Moreover, designs that minimize waste or offer a second use, like packaging that can be repurposed for storage or as a garment bag, reflect a responsible approach to the environment.

[scroll_to title=”5″ link=”5″ bullet=”false”]

[ux_text font_size=”1″ font_size__sm=”1.1″]

Innovative Packaging Ideas

[/ux_text]

In the competitive landscape of fashion retail, clothing brands are constantly seeking innovative ways to stand out. Packaging not only protects garments but also serves as a crucial element of brand identity and customer experience. Below are three cutting-edge packaging strategies that forward-thinking brands are employing.

[ux_image_box style=”none” img=”2905″ image_size=”original”]

[/ux_image_box]
[gap]

[scroll_to title=”6″ link=”6″ bullet=”false”]

[ux_text font_size=”1″ font_size__sm=”1.1″]

Eco-Friendly Options

[/ux_text]

Eco-conscious consumers are increasingly drawn to brands that align with their values, leading many companies to explore sustainable packaging materials. Compostable garment bags and recycled cardboard boxes are examples of eco-friendly packaging that reduce environmental impact. By utilizing biodegradable plastics or plant-based materials, brands send a strong message about their commitment to the planet.

[scroll_to title=”7″ link=”7″ bullet=”false”]

[ux_text font_size=”1″ font_size__sm=”1.1″]

Reusable Packaging

[/ux_text]

Brands that invest in reusable packaging are not only minimizing waste but also enhancing the customer experience. Fabric tote bags or designer boxes that serve secondary functions after purchase encourage customers to keep and reuse them. This approach effectively turns packaging into a practical item, prolonging its life cycle and keeping it out of landfills.

[scroll_to title=”8″ link=”8″ bullet=”false”]

[ux_text font_size=”1″ font_size__sm=”1.1″]

Smart Packaging Technologies

[/ux_text]

Incorporating technology into packaging opens a world of possibilities for customer engagement. Smart packaging technologies include QR codes that customers can scan to access exclusive content or verify the authenticity of the product. RFID tags are another smart feature that streamlines inventory management and improves the customer’s shopping experience by integrating with digital platforms.

[scroll_to title=”9″ link=”9″ bullet=”false”]

[ux_text font_size=”1″ font_size__sm=”1.1″]

Brand Promotion Through Packaging

[/ux_text]

Effective clothing packaging not only protects the product but also serves as a canvas for brand promotion. Distinctive and memorable packaging reinforces brand identity and can become a significant part of the marketing strategy.

[ux_image_box style=”none” img=”2906″ image_size=”original”]

[/ux_image_box]
[gap]

[scroll_to title=”10″ link=”10″ bullet=”false”]

[ux_text font_size=”1″ font_size__sm=”1.1″]

Incorporating Brand Elements

[/ux_text]

When designing packaging, brands meticulously integrate their logos, color schemes, and other trademark features. This consistent use of brand elements on packaging materials like compostable garment bags or boxes imbues the product with a recognizable identity. It’s not just about aesthetics; it’s about making the packaging resonate with the brand’s unique narrative.

[scroll_to title=”11″ link=”11″ bullet=”false”]

[ux_text font_size=”1″ font_size__sm=”1.1″]

Packaging as a Marketing Tool

[/ux_text]

Packaging transforms into a marketing tool when it transcends its traditional role. By embedding QR codes or personalized thank you cards, companies leverage packaging to connect and engage with their audience. An initiative showcasing eco-friendly packaging efforts becomes not just a statement of values, but also an appealing feature for environmentally conscious consumers. Each well-thought-out detail is an opportunity to reinforce the brand message and enhance customer experience.

[scroll_to title=”12″ link=”12″ bullet=”false”]

[ux_text font_size=”1″ font_size__sm=”1.1″]

Practical Aspects of Packaging

[/ux_text]

When it comes to clothing packaging, businesses must prioritize function and economy. Packaging must protect garments and ease distribution while considering costs and logistics.

[ux_image_box style=”none” img=”2908″ image_size=”original”]

[/ux_image_box]
[gap]

[scroll_to title=”13″ link=”13″ bullet=”false”]

[ux_text font_size=”1″ font_size__sm=”1.1″]

Cost-Effective Solutions

[/ux_text]

Packaging options should strike a balance between affordability and quality to ensure products arrive in excellent condition without excessively inflating overheads. Companies may explore bulk purchasing of packaging materials to reduce per-item costs. Utilizing recyclable materials like cardboard or paper can also be cost-effective and appeal to eco-conscious consumers, as exemplified in eco-friendly packaging ideas. Moreover, minimalist designs requiring less material can be used without compromising the brand’s perceived value.

[scroll_to title=”14″ link=”14″ bullet=”false”]

[ux_text font_size=”1″ font_size__sm=”1.1″]

Logistical Considerations

[/ux_text]

Effective packaging facilitates storage and transportation. Items must be suitably protected against potential transit damage, with solutions like SpiroPack void filler acting as an eco-friendly alternative to traditional bubble wrap. Selecting the right size and shape of packaging can save space, reducing shipping costs and the carbon footprint. Intelligent design must also account for easy unpacking and potential returns, ensuring that the packaging supports a smooth customer experience from start to finish.

[scroll_to title=”15″ link=”15″ bullet=”false”]

[ux_text font_size=”1″ font_size__sm=”1.1″]

Packaging for Different Types of Clothing

[/ux_text]

Choosing the right packaging for clothing can elevate the unboxing experience and protect the garments. Each clothing type has distinct packaging requirements that cater to its audience and presentation needs.

[ux_image_box style=”none” img=”2910″ image_size=”original”]

[/ux_image_box]
[gap]

[scroll_to title=”16″ link=”16″ bullet=”false”]

[ux_text font_size=”1″ font_size__sm=”1.1″]

Luxury Garments

[/ux_text]

Luxury garments require packaging that reflects the brand’s high-quality and exclusivity. Compostable garment bags are often used to convey a brand’s commitment to sustainability while maintaining an air of premium quality. The packaging typically uses thick, sturdy materials and may include features such as custom tissue wraps or silk garment bags to enhance the tactile experience and provide additional protection for delicate fabrics.

[scroll_to title=”17″ link=”17″ bullet=”false”]

[ux_text font_size=”1″ font_size__sm=”1.1″]

Casual Wear

[/ux_text]

For casual wear, brands might select more practical and cost-effective packaging solutions. Recycled cardboard boxes or mailers with the brand’s logo can be an excellent choice, balancing brand visibility and environmental responsibility. Some brands also introduce biodegradable plastic bags or tissue wraps that can be branded and colored based on the season or current collection.

[scroll_to title=”18″ link=”18″ bullet=”false”]

[ux_text font_size=”1″ font_size__sm=”1.1″]

Children’s Clothing

[/ux_text]

Packaging for children’s clothing often focuses on bright, engaging designs that appeal to both kids and their parents. Durable plastic bags with child-friendly prints or stickers add a fun twist, while reusable fabric bags serve as an eco-friendly packaging that can later be used for toy storage. The packages may also include safety features, such as drawstring bags without small parts, to ensure child safety.

[scroll_to title=”19″ link=”19″ bullet=”false”]

[ux_text font_size=”1″ font_size__sm=”1.1″]

Customer Experience and Unboxing

[/ux_text]

When it comes to clothing retail, the unboxing experience is pivotal in forging a positive customer perception and enhancing the overall value proposition of the product.

[ux_image_box style=”none” img=”2912″ image_size=”original”]

[/ux_image_box]
[gap]

[scroll_to title=”20″ link=”20″ bullet=”false”]

[ux_text font_size=”1″ font_size__sm=”1.1″]

Creating an Enjoyable Unpacking Experience

[/ux_text]

An enjoyable unpacking experience not only delights customers but also significantly contributes to brand recall and loyalty. To achieve this, retailers invest in creative packaging that goes beyond mere aesthetics. For instance, memorable unboxing experiences often feature customized boxes or unique opening mechanisms that create excitement and anticipation.

  • Material Choice: Use of high-quality materials can signal to the customer that what’s inside is worth their interest. Eco-friendly options also reflect positively on the brand’s values.
  • Visual Appeal: Bold colors, textures, or patterns capture attention. The inclusion of a brand’s logo ensures immediate recognition.
  • Personal Touches: Personalized notes or items tailored to the customer’s preferences make the experience feel exclusive.
  • Functionality: Packaging that can be repurposed encourages prolonged interaction with the brand.

Integration of elements like branded hashtags or catchy slogans can also prompt customers to share their experience on social media, imparting added exposure for the brand. When customers share such moments, it solidifies the bond between them and the brand, developing a community and stirring conversation.

[scroll_to title=”21″ link=”21″ bullet=”false”]

[ux_text font_size=”1″ font_size__sm=”1.1″]

Regulatory Compliance and Standards

[/ux_text]

When packaging clothing items, manufacturers and designers must adhere to a spectrum of regulatory compliance standards and local regulations. This ensures the safety, sustainability, and legal acceptance of their products in the marketplace.

[ux_image_box style=”none” img=”2914″ image_size=”original”]

[/ux_image_box]
[gap]

[scroll_to title=”22″ link=”22″ bullet=”false”]

[ux_text font_size=”1″ font_size__sm=”1.1″]

International Standards

[/ux_text]

Global Compliance: Clothing packaging must meet international standards like ISO, which dictate safe and ethical production processes. For example, the ISO 8124 standard governs the safety of toys, which can be pertinent when packaging children’s clothing with small accessories.

Environmental Considerations: Sustainability standards, such as the Global Recycle Standard (GRS), are crucial for companies aiming to minimize environmental impact and ensure the use of recycled materials in their packaging.

[scroll_to title=”23″ link=”23″ bullet=”false”]

[ux_text font_size=”1″ font_size__sm=”1.1″]

Local Regulations

[/ux_text]

Country-Specific Laws: The United States has specific regulations for apparel and household textiles, as detailed in documents like A Guide to United States Apparel and Household Textiles Compliance Requirements. These include mandatory flammability standards and labeling requirements.

State-Level Rules: Certain states may have additional packaging requirements. For instance, California’s Proposition 65 requires warning labels on products containing chemicals known to cause cancer or reproductive harm.

[scroll_to title=”24″ link=”24″ bullet=”false”]

[ux_text font_size=”1″ font_size__sm=”1.1″]

Future Trends in Clothing Packaging

[/ux_text]

As the fashion industry moves forward, one can notice a clear shift towards packaging that prioritizes environmental responsibility and innovation. This evolution reflects the growing consumer desire for sustainability and the industry’s response to environmental concerns.

[ux_image_box style=”none” img=”2916″ image_size=”original”]

[/ux_image_box]
[gap]

[scroll_to title=”25″ link=”25″ bullet=”false”]

[ux_text font_size=”1″ font_size__sm=”1.1″]

Sustainable Innovations

[/ux_text]

Clothing brands are increasingly adopting compostable garment bags, a trend set to grow as companies aim to reduce their ecological footprint. These bags decompose naturally, leaving no harmful residue behind. Innovative companies are also pioneering the use of recycled materials—from old cardboard to plastic bottles—for their packaging, transforming waste into something both functional and stylish.

Another key trend is the creation of reusable packaging. Brands are designing durable and attractive packaging options that consumers can repurpose, thereby promoting a circular economy. Multi-functional designs allow packaging to serve secondary uses, such as storage or as part of the product itself.

These developments are not only environmentally beneficial but also serve as a powerful branding tool, resonating with eco-conscious customers. Packaging is increasingly designed to be flat-packed, reducing shipping volume and thus carbon emissions. Simple, elegant design using soy-based inks for printing is popular, combining aesthetic appeal with environmental responsibility.

Interweaving these trends is the use of novel materials like mushroom packaging, which can be grown into custom shapes, offering both sustainability and a unique unboxing experience. Brands are exploring ways to integrate QR codes and NFC technology in packaging, enabling customers to access information about recycling and reuse, thus enhancing transparency.

In summary, future clothing packaging will continue to evolve with an emphasis on sustainability, functionality, and customer engagement, aligning with broader environmental goals and consumer expectations.

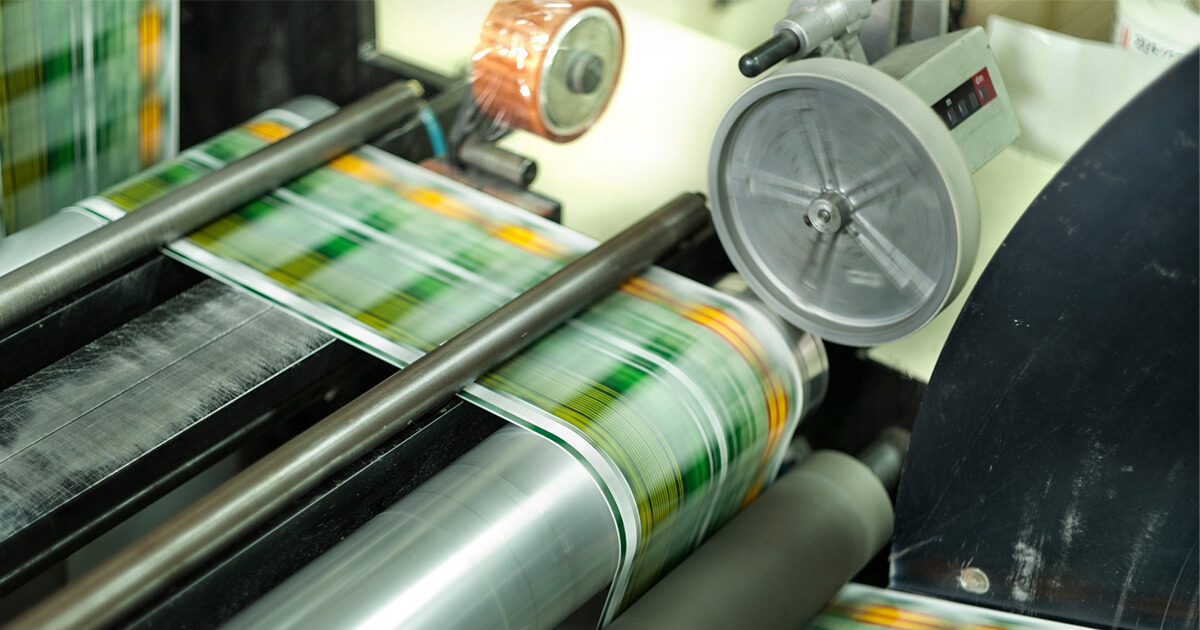
Leather patch hat ideas: Vintage modern and everything in between

leather patch hat ideas

Leather patch hats have emerged as a stylish accessory that can add a touch of personal flair to any outfit. They offer a unique way to blend the rustic charm of leather with the casual feel of a cap, making them a popular choice for fashion enthusiasts and those looking for practical headwear with character. Traditional materials like wool or cotton blends serve as the base for these hats, with a leather patch prominently displayed on the front, often featuring logos, symbols, or custom designs.

The versatility of the leather patch hat makes them suitable for a wide range of people and occasions. They can be dressed up for a more polished look or styled casually for everyday wear. More than just a fashion statement, these hats provide functionality and durability, thanks to the robust quality of leather. As the trend continues to grow, more individuals are seeking creative ways to incorporate leather patches into their headwear, from the classic designs to more modern, edgy takes on the concept. Whether they are bought ready-made or crafted as a do-it-yourself project, leather patch hats create opportunities for expression through various textures, shapes, and sizes.

[section bg_color=”rgb(243, 243, 243)” border=”1px 1px 1px 1px” border_radius=”10″ class=”round-corners”]

[ux_text font_size=”1″ font_size__sm=”1.1″]

Contents

[/ux_text]

1. Types of Leather for Patch Hats

2. Popular Styles of Leather Patch Hats

3. Customization Techniques

4. Designing Your Leather Patch

5. Attachment Methods

6. Care and Maintenance of Leather Patch Hats

7. Trends in Leather Patch Hats

8. Where to Buy Leather Patch Hats

9. How to Make Your Own Leather Patch Hat

[/section]
[gap]

[scroll_to title=”1″ link=”1″ bullet=”false”]

[ux_text font_size=”1″ font_size__sm=”1.1″]

Types of Leather for Patch Hats

[/ux_text]

When selecting a type of leather for patch hats, one must consider the durability, finish, and texture. Each type of leather provides a unique aesthetic and functional quality to the hat.

[ux_image_box style=”none” img=”2884″ image_size=”original”]

[/ux_image_box]
[gap]

[scroll_to title=”2″ link=”2″ bullet=”false”]

[ux_text font_size=”1″ font_size__sm=”1.1″]

Full-Grain Leather

[/ux_text]

Full-grain leather is the highest quality leather, as it includes all layers of the hide. It retains the natural imperfections and grain, which adds character to hat patches. Full-grain leather is extremely durable, making it an excellent choice for a hat that will age beautifully over time.

[scroll_to title=”3″ link=”3″ bullet=”false”]

[ux_text font_size=”1″ font_size__sm=”1.1″]

Top-Grain Leather

[/ux_text]

Top-grain leather is slightly thinner than full-grain as its surface has been sanded to remove imperfections. It has a more uniform finish and is still quite durable. This type of leather is often used for hat patches because it offers a balance between quality and cost, providing a smooth and flexible material.

[scroll_to title=”4″ link=”4″ bullet=”false”]

[ux_text font_size=”1″ font_size__sm=”1.1″]

Suede

[/ux_text]

Suede is crafted from the underside of the leather hide, giving it a soft, napped texture. It is not as durable as full or top-grain leather but offers a distinct look and feel for hat patches. Suede can create a stylish contrast on a leather patch hat, but one should keep in mind its susceptibility to weather and staining.

[scroll_to title=”5″ link=”5″ bullet=”false”]

[ux_text font_size=”1″ font_size__sm=”1.1″]

Synthetic Leather

[/ux_text]

Synthetic leather, also known as faux leather, is a man-made material designed to mimic real leather. It provides a leather-like appearance at a lower cost and with less maintenance. Synthetic leather is versatile and can be an ethical alternative for those seeking a non-animal product for their hat patches.

[scroll_to title=”6″ link=”6″ bullet=”false”]

[ux_text font_size=”1″ font_size__sm=”1.1″]

Popular Styles of Leather Patch Hats

[/ux_text]

Leather patch hats combine the durability of leather with the casual style of various hat types, offering a unique aesthetic that’s both stylish and personal.

[ux_image_box style=”none” img=”2886″ image_size=”original”]

[/ux_image_box]
[gap]

[scroll_to title=”7″ link=”7″ bullet=”false”]

[ux_text font_size=”1″ font_size__sm=”1.1″]

Trucker Hats with Leather Patches

[/ux_text]

Trucker hats are characterized by their mesh backing and foam front panel. Leather patches on these hats often feature logos or custom designs, making them a favorite for brands and personal statements. They provide ample space for the leather patch, standing out as a focal point.

[scroll_to title=”8″ link=”8″ bullet=”false”]

[ux_text font_size=”1″ font_size__sm=”1.1″]

Baseball Caps with Leather Patches

[/ux_text]

The classic baseball cap construction is reinvented with the addition of leather patches, often placed on the cap’s front. This style retains the familiarity of the baseball cap while elevating its appearance with the texture of leather, which can weather beautifully over time.

[scroll_to title=”9″ link=”9″ bullet=”false”]

[ux_text font_size=”1″ font_size__sm=”1.1″]

Beanie Hats with Leather Patches

[/ux_text]

Beanies, typically knit and snug-fitting, can be enhanced with small leather patches. These patches are usually found on the brim or the front, adding a subtle yet distinct touch that contrasts with the soft fabric of the beanie.

[scroll_to title=”10″ link=”10″ bullet=”false”]

[ux_text font_size=”1″ font_size__sm=”1.1″]

Snapback Hats with Leather Patches

[/ux_text]

Snapback hats are known for their adjustable strap at the back and flat brim. Leather patches on snapbacks often bear custom or vintage logos, aligning with contemporary streetwear and retro styles alike.

[scroll_to title=”11″ link=”11″ bullet=”false”]

[ux_text font_size=”1″ font_size__sm=”1.1″]

Bucket Hats with Leather Patches

[/ux_text]

Bucket hats offer a wide, downward-sloping brim, and incorporating leather patches can give them a rugged or bespoke edge. These patches are typically smaller and less obtrusive, providing a tasteful detail to the otherwise soft hat silhouette.

[scroll_to title=”12″ link=”12″ bullet=”false”]

[ux_text font_size=”1″ font_size__sm=”1.1″]

Customization Techniques

[/ux_text]

Customization techniques for leather patch hats allow individuals to create a unique and personal accessory. The techniques vary in their approach and finished look, each with its specific method and charm.

[ux_image_box style=”none” img=”2888″ image_size=”original”]

[/ux_image_box]
[gap]

[scroll_to title=”13″ link=”13″ bullet=”false”]

[ux_text font_size=”1″ font_size__sm=”1.1″]

Laser Engraving

[/ux_text]

Laser engraving offers precision and versatility, allowing for complex designs that are permanently etched onto the leather. This technique vaporizes the leather where the laser beam touches, resulting in a clean, detailed, and durable design.

[scroll_to title=”14″ link=”14″ bullet=”false”]

[ux_text font_size=”1″ font_size__sm=”1.1″]

Embossing

[/ux_text]

Embossing is a technique where designs are pressed into the leather, creating a raised effect. It involves the use of heat and pressure, which causes a permanent change to the leather’s shape and texture, giving the patch a dimensional and tactile quality.

[scroll_to title=”15″ link=”15″ bullet=”false”]

[ux_text font_size=”1″ font_size__sm=”1.1″]

Debossing

[/ux_text]

Conversely, debossing presses the design below the surface of the leather. It’s similar to embossing but results in an indented imprint. This method also uses heat and pressure for a subtle, yet elegant appearance.

[scroll_to title=”16″ link=”16″ bullet=”false”]

[ux_text font_size=”1″ font_size__sm=”1.1″]

Screen Printing

[/ux_text]

For those preferring a pop of color, screen printing applies ink directly onto the leather through a mesh screen. It’s a good choice for larger batches of patches and allows for vibrant, multi-colored designs. However, it may not be as long-lasting as other methods due to wear over time.

[scroll_to title=”17″ link=”17″ bullet=”false”]

[ux_text font_size=”1″ font_size__sm=”1.1″]

Designing Your Leather Patch

[/ux_text]

When creating a custom leather patch for a hat, the designer must carefully consider the shape, graphics, and placement to ensure the patch complements the hat’s style and enhances its overall aesthetic.

[ux_image_box style=”none” img=”2890″ image_size=”original”]

[/ux_image_box]
[gap]

[scroll_to title=”18″ link=”18″ bullet=”false”]

[ux_text font_size=”1″ font_size__sm=”1.1″]

Choosing the Right Shape

[/ux_text]

The shape of the leather patch should align with the hat’s design and the brand it represents. Common shapes include rectangles, circles, and custom die-cut forms tailored to the logo or motif. For example, a circle may be ideal for a classic look, whereas a shield shape can convey a sense of strength or tradition.

[scroll_to title=”19″ link=”19″ bullet=”false”]

[ux_text font_size=”1″ font_size__sm=”1.1″]

Graphic and Text Considerations

[/ux_text]

The clarity of graphics and text on a leather patch is crucial. When incorporating text or logos, one should opt for bold, uncomplicated fonts and easily distinguishable graphics. It’s important to consider the size and intricacy of the design, as fine details may be lost during the embossing or engraving process.

[scroll_to title=”20″ link=”20″ bullet=”false”]

[ux_text font_size=”1″ font_size__sm=”1.1″]

Placement on the Hat

[/ux_text]

For optimal visibility and impact, the leather patch should be positioned where it naturally draws the eye. The front panel is the most common placement, offering maximum exposure. However, designers might also consider the side or back for a subtler statement, as long as it maintains the hat’s balance and does not interfere with its functionality.

[scroll_to title=”21″ link=”21″ bullet=”false”]

[ux_text font_size=”1″ font_size__sm=”1.1″]

Attachment Methods

[/ux_text]

Choosing the right attachment method for a leather patch on a hat is crucial for both the aesthetic appeal and the durability of the final product. Factors such as the material of the hat, the type of leather patch, and the desired permanence of attachment should guide the selection process.

[ux_image_box style=”none” img=”2894″ image_size=”original”]

[/ux_image_box]
[gap]

[scroll_to title=”22″ link=”22″ bullet=”false”]

[ux_text font_size=”1″ font_size__sm=”1.1″]

Sewing

[/ux_text]

For a secure and traditional attachment, sewing is the go-to method. A sew-on patch will remain firmly in place, making it a permanent solution. Sewing necessitates the use of a needle and thread and can be done by hand or with a sewing machine. It’s important to ensure the thread color complements the hat and the patch for a seamless look.

[scroll_to title=”23″ link=”23″ bullet=”false”]

[ux_text font_size=”1″ font_size__sm=”1.1″]

Adhesive

[/ux_text]

Adhesive application is a faster, no-sew option for attaching a leather patch to a hat. This method requires a strong fabric glue designed to work with leather and fabric. Gluing provides a quick fix but may not endure as long as sewing. Care should be taken to apply the glue evenly and avoid any overflow that could affect the finish of the patch or hat.

[scroll_to title=”24″ link=”24″ bullet=”false”]

[ux_text font_size=”1″ font_size__sm=”1.1″]

Heat Seal

[/ux_text]

Heat-activated adhesive, also known as a heat seal, provides a strong bond and allows for easy placement. It involves placing the patch in the desired location, covering it with a cloth, and pressing it with a heated iron. The heat from the iron activates the adhesive, causing it to bond the patch to the hat. It is crucial to follow the temperature guidelines closely to prevent damage to the patch or hat.

[scroll_to title=”25″ link=”25″ bullet=”false”]

[ux_text font_size=”1″ font_size__sm=”1.1″]

Care and Maintenance of Leather Patch Hats

[/ux_text]

Proper care extends the life and preserves the appearance of leather patch hats. They require specific maintenance steps to ensure durability and aesthetic appeal over time.

[ux_image_box style=”none” img=”2896″ image_size=”original”]

[/ux_image_box]
[gap]

[scroll_to title=”26″ link=”26″ bullet=”false”]

[ux_text font_size=”1″ font_size__sm=”1.1″]

Cleaning

[/ux_text]

To clean a leather patch on a hat, it’s crucial to gently wipe the surface with a soft, damp cloth. For tougher spots, one should use a cleaner specifically designed for leather. It is important to refrain from submerging the hat in water or using harsh detergents as they can damage the leather.

[scroll_to title=”27″ link=”27″ bullet=”false”]

[ux_text font_size=”1″ font_size__sm=”1.1″]

Storage

[/ux_text]

When not in use, leather patch hats should be stored in cool, dry places away from direct sunlight. To maintain the shape, they can be stuffed with tissue paper or kept on a hat stand. It’s crucial to avoid compressing the leather patch to prevent deformations.

[scroll_to title=”28″ link=”28″ bullet=”false”]

[ux_text font_size=”1″ font_size__sm=”1.1″]

Leather Conditioning

[/ux_text]

Conditioning the leather patch prevents it from drying out and cracking. One should apply a quality leather conditioner every few months, ensuring even coverage. After the conditioner has been absorbed, a soft microfiber cloth can be used to buff the leather to a soft luster.

[scroll_to title=”29″ link=”29″ bullet=”false”]

[ux_text font_size=”1″ font_size__sm=”1.1″]

Trends in Leather Patch Hats

[/ux_text]
[ux_image_box style=”none” img=”2893″ image_size=”original”]

[/ux_image_box]
[gap]

Leather patch hats remain a popular accessory, merging the rustic appeal of leather with the casual flair of caps. In recent trends, customization has soared, with wearers choosing from various patch designs that represent personal interests, affiliations, or brands.

Popular Styles:

  • Classic Snapbacks: These hats exhibit enduring popularity, favored for their adjustable straps and prominent display of leather patches on the front panel.
  • Trucker Hats: Mesh backing on trucker hats allows for breathability, making them ideal for outdoor activities. The front panel serves as a canvas for a custom leather patch.
  • Beanies with Leather Patches: A winter favorite, beanies are now being adorned with leather patches, adding a touch of class to cozy headwear.

Materials:

  • Full-Grain: High-quality full-grain leather is often sourced for durability and patina that improves with age.
  • Suede: Suede patches add a texture-rich alternative to the glossy finish of traditional leather.

Pom-Pom Addition: A recent quirky addition to the leather patch hat is the pom-pom, incorporating a playful element into the design.

Themes: Leather patches are showcasing a variety of themes, from outdoors and nature to minimalistic logos and custom monograms.

Sustainability: There’s a growing demand for eco-friendly practices in hat production, with brands opting for responsibly sourced leather and recycled materials for the hat itself.

Techniques:

  • Laser Engraving: For intricate designs, laser engraving offers precision.
  • Embossing: For a 3D effect, embossing the leather is a sophisticated choice.

This unique blend of personalization and practicality ensures leather patch hats will continue to evolve with the trends while maintaining their time-honored charm.

[scroll_to title=”30″ link=”30″ bullet=”false”]

[ux_text font_size=”1″ font_size__sm=”1.1″]

Where to Buy Leather Patch Hats

[/ux_text]
[ux_image_box style=”none” img=”2898″ image_size=”original”]

[/ux_image_box]
[gap]

Leather patch hats combine classic style with a personalized touch, suitable for both casual and formal wear. Consumers looking for these stylish accessories have several options available to them for purchase.

Online Marketplaces:

  • Etsy: A premier destination for handcrafted items. Shoppers can find a range of custom leather patch hats, including options for personalized engraving.
  • Etsy Leather Hat Patch Ideas: Offers digital files for those interested in creating their own designs on hats, presenting a variety of leather patch ideas.

Dedicated Specialty Stores:

  • Authentic Leather Patch Hats: Provides customers with unique and trendsetting leather patch hat designs, such as the playful pom-pom leather patch hat.

DIY Resources:

  • YouTube: Hosts tutorial videos for craft enthusiasts looking to create their own leather patch hats from scratch.

For customers seeking a diverse selection, online marketplaces typically offer the widest variety, including designs that cater to individual tastes and the option to purchase pre-made or custom hats. Specialty stores give buyers access to unique designs and may provide higher quality materials and craftsmanship due to their focus on leather goods. Finally, those interested in making their own leather patch hats will find YouTube an invaluable resource, offering step-by-step guides and creative inspiration.

[scroll_to title=”31″ link=”31″ bullet=”false”]

[ux_text font_size=”1″ font_size__sm=”1.1″]

How to Make Your Own Leather Patch Hat

[/ux_text]
[ux_image_box style=”none” img=”2891″ image_size=”original”]

[/ux_image_box]
[gap]

Creating a custom leather patch hat involves a few key steps. One begins by designing a patch that reflects personal style or messaging. It’s important to choose quality leather to ensure durability and aesthetic appeal.

Materials Needed:

  • Leather piece
  • Pen or pencil for tracing
  • Stencil (optional)
  • Sharp scissors or a utility knife
  • Needle and thread or a sewing machine
  • Strong adhesive (if not sewing)
  • Blank hat

Steps:

  1. Design: Select a design for the leather patch. It could be a logo, initials, or any graphic.
  2. Trace: Transfer the design onto the leather piece. Use a pen or a stencil for precision.
  3. Cut: Carefully cut out your traced design with sharp scissors or a utility knife.
  4. Prepare the Hat: Choose an appropriate spot on your blank hat to place the patch.
  5. Attach: Decide whether to sew or glue the patch on the hat. If sewing, use a needle and thread or a sewing machine, ensuring the stitch pattern is secure. For gluing, select a strong adhesive, apply it evenly to the back of the patch, and press it firmly onto the hat.
  6. Finishing Touches: Check for any loose threads or uneven edges, and ensure the patch is firmly attached.

For detailed guidance, the video tutorial “From Raw Leather to Stylish Hat Patches: The Ultimate DIY” walks enthusiasts through the entire process of creating a leather patch hat. Users seeking design inspiration can explore various leather patch hat ideas to spark their creativity.

No more sticky mess: Effortless ways to remove adhesive labels

remove adhesive label

Removing adhesive labels from various surfaces can be a daunting task. Whether it’s a price tag on a new vase or a sticker on a metal surface, the residue left behind can mar the appearance of an item. The challenge is finding a method that effectively gets rid of the adhesive without damaging the material underneath.

Fortunately, there are tried and true strategies for tackling sticky residue. These methods range from using household oils to specialized commercial products. It’s important to consider the surface material, as the approach to removing a sticker from glass might differ significantly from removing one from plastic or wood.

When looking for the right solution, it’s useful to consult expert advice and proven techniques. For instance, Martha Stewart recommends the use of an adhesive remover like Goo-Gone for stubborn labels. And for metal surfaces, This Old House provides guidelines on how to remove sticker residue without causing damage. Additionally, wikiHow offers a variety of options for different surface types, including a homemade paste of cooking oil and baking soda.

[section bg_color=”rgb(243, 243, 243)” border=”1px 1px 1px 1px” border_radius=”10″ class=”round-corners”]

[ux_text font_size=”1″ font_size__sm=”1.1″]

Contents

[/ux_text]

1. Overview of Adhesive Label Removal

2. Pre-Removal Preparations

3. Peeling Techniques

4. Adhesive Residue Removal

5. Post-Removal Cleaning

6. Preventive Measures

7. Troubleshooting Common Issues

[/section]
[gap]

[scroll_to title=”1″ link=”1″ bullet=”false”]

[ux_text font_size=”1″ font_size__sm=”1.1″]

Overview of Adhesive Label Removal

[/ux_text]

Removing adhesive labels can be challenging due to the various adhesives and label materials. Knowing the correct methods and substances to use is essential for effective label removal without damaging the underlying surface.

[ux_image_box style=”none” img=”2868″ image_size=”original”]

[/ux_image_box]
[gap]

[scroll_to title=”2″ link=”2″ bullet=”false”]

[ux_text font_size=”1″ font_size__sm=”1.1″]

Types of Adhesives

[/ux_text]

Permanent adhesives are designed to create a strong bond and typically require solvents, such as rubbing alcohol or specialized adhesive removers, to break them down. Repositionable adhesives, on the other hand, provide a temporary hold and can often be peeled away with minimal residue. Some adhesives may dissolve in oil-based solutions like WD-40.

[scroll_to title=”3″ link=”3″ bullet=”false”]

[ux_text font_size=”1″ font_size__sm=”1.1″]

Materials of Labels

[/ux_text]

Labels can be made from a variety of materials including paper, vinyl, and plastic. Paper labels often soak up liquids, which can assist in their removal when substances like vinegar are applied. For more durable materials like vinyl or plastic, methods may include heat application or physical scraping after the adhesive has been loosened.

[scroll_to title=”4″ link=”4″ bullet=”false”]

[ux_text font_size=”1″ font_size__sm=”1.1″]

Pre-Removal Preparations

[/ux_text]

Removing adhesive labels requires careful planning to ensure the integrity of the surface material remains intact. Choosing an appropriate solvent and having the right tools on hand are both essential steps for a successful removal process.

[ux_image_box style=”none” img=”2869″ image_size=”original”]

[/ux_image_box]
[gap]

[scroll_to title=”5″ link=”5″ bullet=”false”]

[ux_text font_size=”1″ font_size__sm=”1.1″]

Assessing Surface Material

[/ux_text]

Before proceeding with label removal, it’s crucial to identify the surface material. Different materials react differently to various removal methods. For example, materials like glass can tolerate harsher solvents in comparison to plastics, which may require gentler approaches to prevent damage.

[scroll_to title=”6″ link=”6″ bullet=”false”]

[ux_text font_size=”1″ font_size__sm=”1.1″]

Choosing the Right Solvent

[/ux_text]

Once the surface material is assessed, selecting the right solvent is the next critical step. For durable materials, products like WD-40 may be suitable. However, more delicate materials might benefit from non-acetone alternatives, such as white vinegar or isopropyl alcohol.

[scroll_to title=”7″ link=”7″ bullet=”false”]

[ux_text font_size=”1″ font_size__sm=”1.1″]

Gathering Necessary Tools

[/ux_text]

In addition to the solvent, assembling the necessary tools is important. Here’s a quick checklist:

  • Cloths: Soft, clean, and free of any lint
  • Plastic scraper: To gently lift the label without scratching the surface
  • Gloves: To protect hands from solvents
  • Bowl or container: For solvent application or soaking if needed

[scroll_to title=”8″ link=”8″ bullet=”false”]

[ux_text font_size=”1″ font_size__sm=”1.1″]

Peeling Techniques

[/ux_text]

Removing adhesive labels can be approached through various peeling techniques. Each method serves a specific type of surface and adhesive strength.

[ux_image_box style=”none” img=”2870″ image_size=”original”]

[/ux_image_box]
[gap]

[scroll_to title=”9″ link=”9″ bullet=”false”]

[ux_text font_size=”1″ font_size__sm=”1.1″]

Manual Peeling Methods

[/ux_text]

Manual peeling is the simplest form of removing labels, often requiring no more than a careful approach and patience. The key is to start at a corner of the label and peel back slowly at an angle to reduce the chance of leaving residue behind. It is helpful to use a blade or a fingernail for lifting the label edge.

  • Fingernails: Ideal for lifting the corner of the label without tools.
  • Blades: Use a razor blade or a knife edge to initiate peeling, suitable for tougher labels.

For best results, the action should be smooth and consistent, avoiding rapid movements that may tear the label.

[scroll_to title=”10″ link=”10″ bullet=”false”]

[ux_text font_size=”1″ font_size__sm=”1.1″]

Mechanical Assistance

[/ux_text]

For more stubborn adhesives, mechanical tools can assist in the removal process. These methods apply direct physical force to ease the label off the surface.

  • Plastic Scrapers: Safely scrape without scratching the surface.
  • Rubber Erasers: Employ friction to roll adhesives away from the surface.
  • Label Peeler Tools: Specially designed for removing labels with a sliding action.

Mechanical assistance often requires repeated action across the entirety of the label to ensure complete removal. It is essential to use gentle pressure to prevent damage to the underlying surface.

[scroll_to title=”11″ link=”11″ bullet=”false”]

[ux_text font_size=”1″ font_size__sm=”1.1″]

Adhesive Residue Removal

[/ux_text]

Removing adhesive residue requires careful selection of the right method to avoid damaging the surface. There are various approaches one can take, from chemical solvents designed to dissolve the adhesive to natural alternatives that reduce environmental impact, and abrasive techniques that physically scrape off the residue.

[ux_image_box style=”none” img=”2872″ image_size=”original”]

[/ux_image_box]
[gap]

[scroll_to title=”12″ link=”12″ bullet=”false”]

[ux_text font_size=”1″ font_size__sm=”1.1″]

Chemical Solvent Use

[/ux_text]

Chemical solvents are effective in breaking down the adhesive for easy removal. A popular option is acetone, found in nail polish remover, which works well on non-porous surfaces. One must apply a small amount, let it sit for a few minutes, and then gently wipe it away. It’s important to test the solvent on a small, inconspicuous area first to ensure it doesn’t damage the surface.

[scroll_to title=”13″ link=”13″ bullet=”false”]

[ux_text font_size=”1″ font_size__sm=”1.1″]

Natural Solvent Options

[/ux_text]

For those preferring eco-friendly solutions, several natural solvents can dissolve sticker residue. A combination of baking soda and cooking oil makes a paste that can be applied, left to sit, and then wiped clean. Another common household item, olive oil or canola oil, can be rubbed onto the sticky area, left to penetrate, and then scraped off with a plastic tool or wiped clean with a rag.

[scroll_to title=”14″ link=”14″ bullet=”false”]

[ux_text font_size=”1″ font_size__sm=”1.1″]

Abrasive Methods for Residue

[/ux_text]

For residue that’s stubborn, abrasive methods can be employed. Warm, soapy water can soften the adhesive, allowing one to use a sponge or plastic scraper to remove it. Another method is to use a mixture of hot water and dish soap to soak the item, such as glass, and then scrub the residue off after some time. Always use the least abrasive tool necessary to prevent surface damage.

[scroll_to title=”15″ link=”15″ bullet=”false”]

[ux_text font_size=”1″ font_size__sm=”1.1″]

Post-Removal Cleaning

[/ux_text]

After successfully removing a sticker or label, the area often requires further cleaning to eliminate any remaining adhesive residue. This ensures the surface returns to a pristine state, free from both visual blemishes and tactile stickiness.

[ux_image_box style=”none” img=”2876″ image_size=”original”]

[/ux_image_box]
[gap]

[scroll_to title=”16″ link=”16″ bullet=”false”]

[ux_text font_size=”1″ font_size__sm=”1.1″]

Surface Cleaning Protocols

[/ux_text]

To clean the surface after adhesive removal, one should employ a method that both dissolves the sticky residues and is safe for the material underneath. For hard surfaces, a cleaning solution made from coconut oil and baking soda provides a natural and effective option. Apply the mixture with a soft cloth, then gently rub the area to lift and dissolve the residue. Following the application, it’s critical to wipe the surface with a separate clean cloth to remove any oily remnants and prevent potential slip hazards.

For sensitive materials such as paper or delicate fabrics, opting for a non-oil-based cleaner such as a mix of warm water and mild soap minimizes the risk of damage. Apply sparingly with a soft sponge, and then pat dry with a towel to prevent saturation and preserve the material integrity.

[scroll_to title=”17″ link=”17″ bullet=”false”]

[ux_text font_size=”1″ font_size__sm=”1.1″]

Disposal of Residue

[/ux_text]

The disposal of adhesive residues should be done thoughtfully to avoid environmental contamination or unintended stickiness on other surfaces. Scrapings and used cleaning materials containing adhesive should be placed in a sealed bag or container before being discarded in the trash. If the adhesives are non-toxic, like those found on everyday household labels, this method is adequate. For industrial-strength adhesives or larger quantities, it may be necessary to consult local waste management protocols to ensure safe and compliant disposal.

[scroll_to title=”18″ link=”18″ bullet=”false”]

[ux_text font_size=”1″ font_size__sm=”1.1″]

Preventive Measures

[/ux_text]

Taking precautionary steps can significantly reduce the need for adhesive label removal. Proper label application and surface treatment can ensure labels only stick where they’re wanted and reduce residue upon removal.

[ux_image_box style=”none” img=”2877″ image_size=”original”]

[/ux_image_box]
[gap]

[scroll_to title=”19″ link=”19″ bullet=”false”]

[ux_text font_size=”1″ font_size__sm=”1.1″]

Label Application Tips

[/ux_text]

One must ensure the surface is clean and dry before label application. Dust, oils, or moisture can weaken the adhesive bond and lead to premature peeling or the need for extra cleaning upon removal. Labels should be applied with even pressure to avoid air bubbles, which not only look unsightly but also compromise the adhesive’s effectiveness.

[scroll_to title=”20″ link=”20″ bullet=”false”]

[ux_text font_size=”1″ font_size__sm=”1.1″]

Surface Protection Advice

[/ux_text]

Applying a temporary protective layer on the surface can facilitate easier label removal. Products such as a water-based wax for metal or a clear plastic sheet for books provide a barrier that can prevent adhesive from bonding directly with the surface. Not only do these protective measures simplify label removal, but they also help maintain the integrity of the surface underneath.

[scroll_to title=”21″ link=”21″ bullet=”false”]

[ux_text font_size=”1″ font_size__sm=”1.1″]

Troubleshooting Common Issues

[/ux_text]

When attempting to remove adhesive labels, one may face issues such as leftover sticker remnants or potential surface damage. Understanding the most effective methods to tackle these challenges is crucial for a clean removal process.

[ux_image_box style=”none” img=”2878″ image_size=”original”]

[/ux_image_box]
[gap]

[scroll_to title=”22″ link=”22″ bullet=”false”]

[ux_text font_size=”1″ font_size__sm=”1.1″]

Sticker Remnants

[/ux_text]

After removing a label, sticker remnants often remain. One can address this by applying an adhesive remover specially designed for labels, such as Goo Gone, onto the residue. A key tip is to let the solution sit for a moment to soften the adhesive, then gently wipe away the remnants with a clean cloth.

[scroll_to title=”23″ link=”23″ bullet=”false”]

[ux_text font_size=”1″ font_size__sm=”1.1″]

Surface Damage Concerns

[/ux_text]

Concerns regarding surface damage can arise, especially when dealing with delicate materials. It is advisable to test any adhesive removal solution on an inconspicuous area to ensure it doesn’t harm the surface. If a label is applied to a sensitive area, using a hairdryer to warm the adhesive may allow for gentle peeling without damage.

How to remove heat seal labels from clothing: Easy methods to try.

how to remove heat seal labels from clothing

Removing heat-seal labels from clothing can be a useful skill when one wishes to repurpose a garment, remove branding, or prevent skin irritation caused by the label. Many garments come with heat-seal labels, which are securely attached using heat-activated adhesive. These labels can sometimes be more challenging to remove than traditional sewn-in tags. However, with the right approach and a bit of patience, it’s possible to take them off cleanly without damaging the fabric.

The process typically involves applying heat to loosen the adhesive and then gently peeling the label away. There are several methods to achieve this, ranging from using a regular household iron to implementing alternative techniques involving common household items. To ensure success, it’s essential to understand the fabric’s tolerance to heat and to follow the steps carefully, preventing any residual adhesive from remaining on the fabric or causing discoloration.

[section bg_color=”rgb(243, 243, 243)” border=”1px 1px 1px 1px” border_radius=”10″ class=”round-corners”]

[ux_text font_size=”1″ font_size__sm=”1.1″]

Contents

[/ux_text]

1. Understanding Heat Seal Labels

2. Preparation Before Removal

3. Removal Techniques

4. Post-Removal Steps

5. Preventive Measures

6. Troubleshooting

7. Legal Considerations

[/section]
[gap]

[scroll_to title=”1″ link=”1″ bullet=”false”]

[ux_text font_size=”1″ font_size__sm=”1.1″]

Understanding Heat Seal Labels

[/ux_text]

Heat seal labels are affixed to garments using a combination of pressure and heat, they become integral parts of fabric items. This section explores their composition, usage, and why one might need to remove them.

[ux_image_box style=”none” img=”2851″]

[/ux_image_box]
[gap]

[scroll_to title=”2″ link=”2″ bullet=”false”]

[ux_text font_size=”1″ font_size__sm=”1.1″]

Composition of Heat Seal Labels

[/ux_text]

Heat seal labels are typically made from a form of plastic or polyester film that is backed with a strong adhesive. Materials may include PVC, polyurethane, or vinyl. These labels are engineered to withstand high temperatures and multiple washings while maintaining their integrity.

[scroll_to title=”3″ link=”3″ bullet=”false”]

[ux_text font_size=”1″ font_size__sm=”1.1″]

Function and Use

[/ux_text]

The primary use of heat seal labels is for branding, providing instructions, or conveying information about the product. They are commonly found on garments, accessories, and even some industrial products. Unlike sewn-in tags, heat seal labels create a smooth surface that doesn’t irritate the skin.

[scroll_to title=”4″ link=”4″ bullet=”false”]

[ux_text font_size=”1″ font_size__sm=”1.1″]

Reasons for Removal

[/ux_text]

Individuals may choose to remove heat seal labels for comfort, due to skin sensitivity, or to repurpose the clothing item. In other instances, improper application or the label’s degradation over time can necessitate its removal to maintain the item’s appearance or function.

[scroll_to title=”5″ link=”5″ bullet=”false”]

[ux_text font_size=”1″ font_size__sm=”1.1″]

Preparation Before Removal

[/ux_text]

Before attempting to remove a heat seal label from clothing, one must ensure that all necessary items are at hand and understand the garment’s care instructions to avoid damage. Testing fabric heat sensitivity is also crucial to prevent altering its texture or color.

[ux_image_box style=”none” img=”2855″]

[/ux_image_box]
[gap]

[scroll_to title=”6″ link=”6″ bullet=”false”]

[ux_text font_size=”1″ font_size__sm=”1.1″]

Gather Necessary Materials

[/ux_text]

To start, one needs the following items:

  • Heat source: An iron or heat press.
  • Thin cloth: For protecting the fabric from direct heat.
  • Tweezers: To peel off the label after heating.
  • Adhesive remover: Optional, for residual glue.

[scroll_to title=”7″ link=”7″ bullet=”false”]

[ux_text font_size=”1″ font_size__sm=”1.1″]

Read Clothing Label Instructions

[/ux_text]

Carefully examine the garment’s care label for the following:

  • Fabric type: Some materials like silk are heat sensitive.
  • Washing and ironing temperatures: Adhere to these specifications.
  • Additional care instructions: Can inform the removal process.

[scroll_to title=”8″ link=”8″ bullet=”false”]

[ux_text font_size=”1″ font_size__sm=”1.1″]

Test Fabric for Heat Sensitivity

[/ux_text]

Conduct a heat sensitivity test:

  1. Select an inconspicuous area.
  2. Apply heat with a thin cloth barrier.
  3. Observe any changes to fabric texture or color.

If the fabric reacts negatively, adjust heat settings or explore alternative removal methods without heat.

[scroll_to title=”9″ link=”9″ bullet=”false”]

[ux_text font_size=”1″ font_size__sm=”1.1″]

Removal Techniques

[/ux_text]

When removing heat seal labels from clothing, it is essential to choose a method that will not damage the fabric. The following techniques can assist in clean and efficient label removal without leaving residue.

[ux_image_box style=”none” img=”2853″]

[/ux_image_box]
[gap]

[scroll_to title=”10″ link=”10″ bullet=”false”]

[ux_text font_size=”1″ font_size__sm=”1.1″]

Heat Application Method

[/ux_text]

Applying heat directly can soften the adhesive, allowing for easier removal of the heat seal label. One can use an iron over a piece of parchment paper to heat the label evenly. After a few seconds, they should try to peel the label off carefully with tweezers.

[scroll_to title=”11″ link=”11″ bullet=”false”]

[ux_text font_size=”1″ font_size__sm=”1.1″]

Solvent-Based Method

[/ux_text]

Certain solvents are effective in dissolving the adhesive under a label. The user must apply a small amount of solvent, like nail polish remover, and gently rub it over the label area. After the solvent has penetrated, the label should be easier to peel away.

[scroll_to title=”12″ link=”12″ bullet=”false”]

[ux_text font_size=”1″ font_size__sm=”1.1″]

Freezing Method

[/ux_text]

Freezing can harden the adhesive, making the label brittle and easier to pull off. They should place the garment in the freezer for a sufficient time and then attempt to remove the label with a blunt tool.

[scroll_to title=”13″ link=”13″ bullet=”false”]

[ux_text font_size=”1″ font_size__sm=”1.1″]

Mechanical Method

[/ux_text]

For labels that are particularly stubborn, gentle mechanical action can help. An individual may use tools like tweezers or a knife to carefully lift the edges of the label. They should be cautious to avoid damaging the fabric.

[scroll_to title=”14″ link=”14″ bullet=”false”]

[ux_text font_size=”1″ font_size__sm=”1.1″]

Post-Removal Steps

[/ux_text]

After the heat seal label is successfully removed, it is important to address any residual adhesive, ensure the garment is cleaned properly, and check for any necessary repairs.

[ux_image_box style=”none” img=”2857″]

[/ux_image_box]
[gap]

[scroll_to title=”15″ link=”15″ bullet=”false”]

[ux_text font_size=”1″ font_size__sm=”1.1″]

Cleaning Residue

[/ux_text]

The removal of a heat seal label may leave behind a sticky residue. Carefully apply a solvent that is safe for the fabric, such as rubbing alcohol or a commercial adhesive remover to the affected area. Dab gently with a clean cloth until the residue lifts away. Always perform a spot test in an inconspicuous area first to ensure the solvent does not damage the fabric.

[scroll_to title=”16″ link=”16″ bullet=”false”]

[ux_text font_size=”1″ font_size__sm=”1.1″]

Washing and Drying

[/ux_text]

Once the residue has been removed, launder the garment according to its care label instructions. Machine wash cold and tumble dry on low heat, or if the fabric is delicate, opt for hand washing and air drying. This helps to eliminate any remaining solvent and ensures the garment is clean and fresh.

[scroll_to title=”17″ link=”17″ bullet=”false”]

[ux_text font_size=”1″ font_size__sm=”1.1″]

Inspection and Repair

[/ux_text]

Upon completion of washing and drying, inspect the previously labeled area for any fabric damage or discoloration. If any damage is present, such as loosened threads or tears, consider sewing or applying a fabric patch for repair. If discoloration has occurred, further treatment with a color-safe bleach may be necessary, but testing on a small section is advised before proceeding with the full area.

[scroll_to title=”18″ link=”18″ bullet=”false”]

[ux_text font_size=”1″ font_size__sm=”1.1″]

Preventive Measures

[/ux_text]

When seeking to maintain the integrity of clothing while using heat seal labels, it’s crucial to choose labels designed for easy removal and to apply them in a manner that minimizes potential damage to the fabric.

[ux_image_box style=”none” img=”2859″]

[/ux_image_box]
[gap]

[scroll_to title=”19″ link=”19″ bullet=”false”]

[ux_text font_size=”1″ font_size__sm=”1.1″]

Choosing Easily Removable Labels

[/ux_text]

One should select heat seal labels that are known for their ability to be removed cleanly. Manufacturers often specify if their labels are easy to unfasten without leaving residue. It’s advisable to test a label on a small, inconspicuous area of the garment before applying it widely.

[scroll_to title=”20″ link=”20″ bullet=”false”]

[ux_text font_size=”1″ font_size__sm=”1.1″]

Properly Attaching Labels to Avoid Damage

[/ux_text]

The method of applying labels plays a pivotal role in how easily they can later be removed. One must follow the manufacturer’s instructions carefully, using the right amount of heat and pressure. This ensures the label bonds effectively without over-melting the adhesive, which can lead to tougher removal and potential damage to the garment.

[scroll_to title=”21″ link=”21″ bullet=”false”]

[ux_text font_size=”1″ font_size__sm=”1.1″]

Troubleshooting

[/ux_text]

In the process of removing heat seal labels from clothing, one may encounter a few challenges. The following advice addresses common difficulties and provides clear, effective solutions.

[ux_image_box style=”none” img=”2863″]

[/ux_image_box]
[gap]

[scroll_to title=”22″ link=”22″ bullet=”false”]

[ux_text font_size=”1″ font_size__sm=”1.1″]

Dealing with Stubborn Residues

[/ux_text]

When a heat seal label has been removed but leaves behind a sticky residue, one should proceed with care. Firstly, they can apply a small amount of goo remover specifically designed for fabrics, letting it sit for the recommended time before gently wiping it off. Secondly, if residue persists, placing a piece of wax paper over the area and applying a warm iron can help transfer the residue to the paper.

  • Do use a cotton swab for precise application of goo remover.
  • Don’t soak the fabric as it may damage the material or alter its color.

[scroll_to title=”23″ link=”23″ bullet=”false”]

[ux_text font_size=”1″ font_size__sm=”1.1″]

Caring for Delicate Fabrics

[/ux_text]

Delicate fabrics require a gentle touch when removing heat seal labels. Cool air from a hairdryer can loosen the adhesive without the risk of heat damage. For silks or wools, they should lay a damp cloth over the label and press with a cool iron, avoiding direct heat.

  • Always test the removal method on a small, inconspicuous area first.
  • Never use high heat or harsh chemicals directly on delicate fabrics.

[scroll_to title=”24″ link=”24″ bullet=”false”]

[ux_text font_size=”1″ font_size__sm=”1.1″]

Legal Considerations

[/ux_text]

Before attempting to remove a heat seal label from clothing, it’s important to consider the legal implications such as compliance with label removal laws and understanding the nuances of warranty and return policies.

[ux_image_box style=”none” img=”2861″]

[/ux_image_box]
[gap]

[scroll_to title=”25″ link=”25″ bullet=”false”]

[ux_text font_size=”1″ font_size__sm=”1.1″]

Label Removal Laws

[/ux_text]

Labeling laws dictate that certain information must remain on clothing labels to ensure consumers are fully informed about the garments they purchase. In the United States, the Federal Trade Commission (FTC) requires that manufacturers and importers attach care labels with cleaning instructions and fabric content. Removing labels may be illegal if it leads to misrepresentation of the garment’s origin, fiber content, or care instructions, which can be considered a violation of the FTC’s Textile Fiber Products Identification Act.

[scroll_to title=”26″ link=”26″ bullet=”false”]

[ux_text font_size=”1″ font_size__sm=”1.1″]

Warranty and Return Policies

[/ux_text]

Upon removing a heat seal label, one must consider the retailer’s warranty and return policies. Many retailers only accept returns if the original labels and tags are intact. By removing a label, consumers may inadvertently void any warranty or guarantee associated with the product. This can also extend to the ability to return or exchange an item, so it is advisable to read the specific terms of a product’s return policy before proceeding with label removal.

Best Casinos for Indian Players You Can Enjoy


Guide to Best Casinos for Indian Players Online


Choosing where to place your bets can significantly influence your gaming experience. Prioritize platforms that offer a wide array of slot machines, table games, and live dealer options while ensuring a safe and secure environment for transactions.

Platforms with a strong reputation often provide enticing welcome bonuses and ongoing promotions. Look for sites that feature customer support available 24/7, which can be crucial for addressing any concerns promptly. This is where best online casinos vavada.com.am comes into play, showcasing some elite options catering specifically to your favorite gaming preferences.

Consider the payment options available, with an emphasis on those that facilitate quick withdrawals and deposits. Additionally, familiarize yourself with the platform’s license; reputable operators typically hold licenses from respected jurisdictions, ensuring fairness and transparency in their gaming practices.

Top Features to Look for in Online Casinos for Indian Players

Prioritize platforms that offer comprehensive language options, especially Hindi and other regional dialects, ensuring seamless navigation and support. Flexible payment methods are essential; look for options such as UPI, Paytm, and other local e-wallets alongside traditional bank transfers. A variety of currencies, particularly INR, enhances convenience and minimizes conversion fees.

Additionally, assess the bonus structures; attractive welcome bonuses and ongoing promotions tailored for local users can enhance the gaming experience significantly. Strong customer service is a must, ideally with 24/7 support via chat or phone in your preferred language, while robust security protocols and licensing information foster a trustworthy environment. Lastly, check for an extensive selection of games, ranging from slots to live dealer options, ensuring a rich diversity of entertainment.

Payment Methods that Suit Indian Players at Online Casinos

UPI (Unified Payments Interface) stands out as a preferred choice for many. This instant payment system enables smooth transactions across various platforms, making it a favorite among users due to its ease of use and integration with numerous banking options.

Popular Payment Options

  • Net Banking: Almost all major banks in India offer net banking services, allowing players to transfer funds directly from their bank accounts.
  • e-Wallets: Paytm, PhonePe, and Google Pay are widely accepted. These options offer semi-anonymity and quicker transaction times.
  • Cryptocurrency: Bitcoin and Ethereum usage is on the rise in the gaming sector due to their decentralized nature, providing anonymity and security.

Credit and debit cards from major banks facilitate convenient funding methods. Visa and Mastercard transactions are common, allowing for direct deposits and withdrawals. However, some users face limitations based on their banks’ policies regarding online gambling.

Transaction Speed and Fees

Each method varies in transaction speeds and fees. UPI and e-wallets typically process transactions instantly, whereas bank transfers may take longer. Players should review the fee structures of their chosen payment method, as some may charge additional processing fees.

  • Instant Transactions: UPI, Paytm, and e-Wallets.
  • 1-3 Business Days: Traditional bank transfers.

Security is paramount. Look for platforms that utilize SSL encryption to safeguard user data. e-Wallets and cryptocurrencies often provide an extra layer of security, reducing the likelihood of fraud or chargebacks.

Customer support is also essential. Check if payment providers offer robust assistance via chat or telephone, prompting swift resolution of any issues that may arise.

Best Online Casino Games Popular Among Indian Gamers

Slot machines lead the popularity charts, especially those themed around Indian culture or mythology. Titles like “Kahuna’s Quest” and “Bollywood Nights” attract significant attention, offering engaging visuals and culturally resonant narratives.

Live dealer games present an immersive experience. Games like live blackjack and live roulette have surged, allowing players to interact with real dealers via video streams. This format caters to the preference for authentic casino experiences from home.

Teen Patti is a traditional card game gaining traction on various platforms. Its simple rules and engaging gameplay make it a favorite among many. Several casinos feature different variations, catering to both novice and experienced players.

Baccarat, particularly the mini-baccarat variant, appeals to those seeking a mix of simplicity and excitement. With its low house edge, it attracts players looking to maximize their bankroll over extended sessions.

Andar Bahar stands out as an easy-to-learn card game that has gained immense popularity. Its fast-paced nature allows for multiple rounds within a short timeframe, enhancing the entertainment factor.

Video poker options, such as Jacks or Better and Deuces Wild, attract players interested in skill-based gaming. These games require strategy, appealing to those who wish to enhance their gaming experience beyond sheer luck.

Emerging titles such as cryptocurrency-based slots and games integrated with cutting-edge technology like VR could further transform player engagement. Keeping abreast of these trends ensures a more exciting gaming journey ahead.